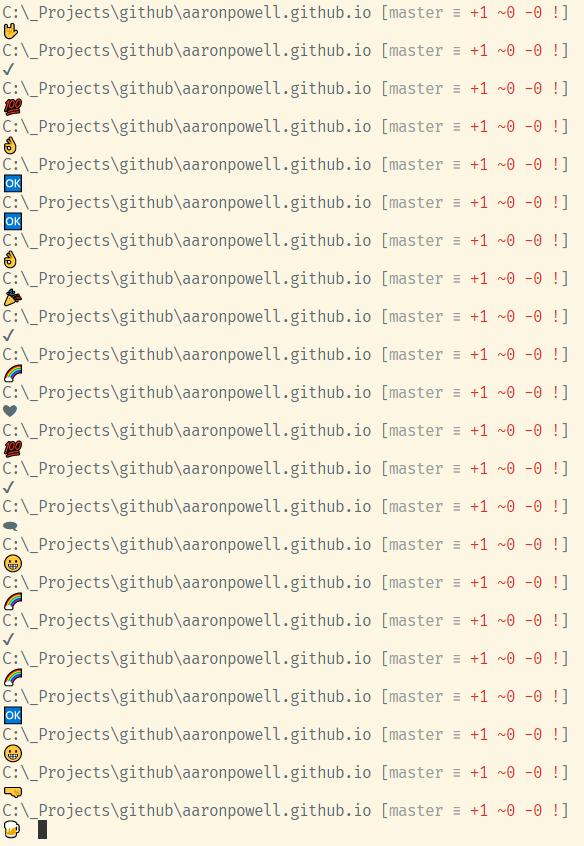
Recently, for no particularly good reason, I decided to mess around with my PowerShell prompt and create what I’m dubbing the Happy PowerShell Prompt.
Did you know that you can customise the PowerShell prompt like that? Well it turns out that it’s actually quite easy, PowerShell has a bunch of built in functions that you can override to change the operation, one such function is function:\prompt, and overriding this will override your prompt!
First off, before we pull anything apart maybe we should look at what we’re currently seeing, easiest way to do this is with Get-Content:
| |
This should return you something like so:
"PS $($executionContext.SessionState.Path.CurrentLocation)$('>' * ($nestedPromptLevel + 1)) ";
# .Link
# http://go.microsoft.com/fwlink/?LinkID=225750
# .ExternalHelp System.Management.Automation.dll-help.xml
Now the top line is obviously the important stuff, that’s how your prompt works. You’ll see it’s an interpolated string that contains PS followed by the current path and the number of nested PowerShell sessions you’re in (to be honest I didn’t know what it was until I started reading about Host.EnterNestedPrompt) which I won’t go into here.
Ok, well now we can start futzing with it:
| |
First you need to define a script blog that contains your new prompt value, and then we use the Set-Item to set the value of function:\prompt.
Ta-da! You’ve now got yourself a prompt that tells you something important, that I rock!
But unfortunately that will only work for the current PowerShell session, and we want something persistent. Time to crack open your PowerShell profile. First thing you need to do is find out if you have a PowerShell profile:
| |
So here I find that the profile didn’t exist so we created a new one which lives in your %USERPROFILE%\Documents\WindowsPowerShell folder (I’m doing it inside a Docker container, because, why not 😛).
Now grab your code from above, paste it in and launch a new PowerShell session, your profile is applied and you’ll always see that I rock!
Making a happy prompt
Ok, so maybe a prompt telling you that Aaron Rocks isn’t going to work for everyone, let’s have a look at how to create the Happy PowerShell Prompt from above.
For it I have 3 things happening:
- I show the current path
- I show the git repo status, if I’m in a folder with a git repo
- Show something positive
Well we know how to get the current path, that’s easy, how about the git info? For that I’m using the excellent Posh-Git module, which if you’re using git on Windows and not using Posh-Git, you’re missing out. Posh-Git in fact will want to modify your prompt for you anyway, but unfortunately it doesn’t play well with what I’m going to do, so instead I’m going to manually invoke it.
First things first I need to know if I’m in a git repo on disk, to do that I’ll just make the assumption that if there’s a .git repo in the current folder, or any of its parents, I’m in a git repo. For that I’m going to create 2 functions, one that imports Posh-Git, and one that checks for a .git folder:
| |
I’m also tracking a variable of whether I loaded Posh-Git already so I don’t load it multiple times. Now you’ll notice inside the IsGitRepo function I call Write-VscStatus. This is a function provided by Posh-Get and it’ll output the status like you see in my path above at the current location, so all good, we’re getting our git status!
Finally I’m going to create an array of curated happy emoji, use the Get-Random PowerShell function to select one and then append it to my prompt. Here’s how it all looks:
| |
To get the line break I’m inserting a `n before the emoji.
And there you have it, your very own happy prompt.
A word of caution - if you make your prompt too complex and run commands in it you can slow down your shell, remember this executes each time. Also, be careful you don’t break exit codes 😉.
